How do I change the Maintenance box on my product?
Maintenance Box Handling Precautions
Read the following instructions before replacing the maintenance box.
- Do not drop the maintenance box or subject it to strong shocks.
- Do not replace the maintenance box during printing; otherwise, ink may leak.
- Do not remove the maintenance box or open its cover except when replacing the maintenance box; otherwise ink may leak.
- Do not reuse a maintenance box which has been removed and left detached for a long period. Ink inside the box will have solidified and no more ink can be absorbed.
- Do not tilt the used maintenance box until after it is sealed in the plastic bag; otherwise ink may leak.
- Do not store the maintenance box in high or freezing temperatures.
- Keep the maintenance box out of direct sunlight.
- Do not touch the openings in the maintenance box as you may get smeared with ink.
- If you are using a maintenance box that is near the end of its service life, you may need to replace it while printing. If you replace the maintenance box while printing, especially on glossy paper, colours on the printout may be uneven depending on how the ink dries. For best results, we recommend replacing the cartridge before printing.
-
Remove the new maintenance box from its package.
 IMPORTANT:
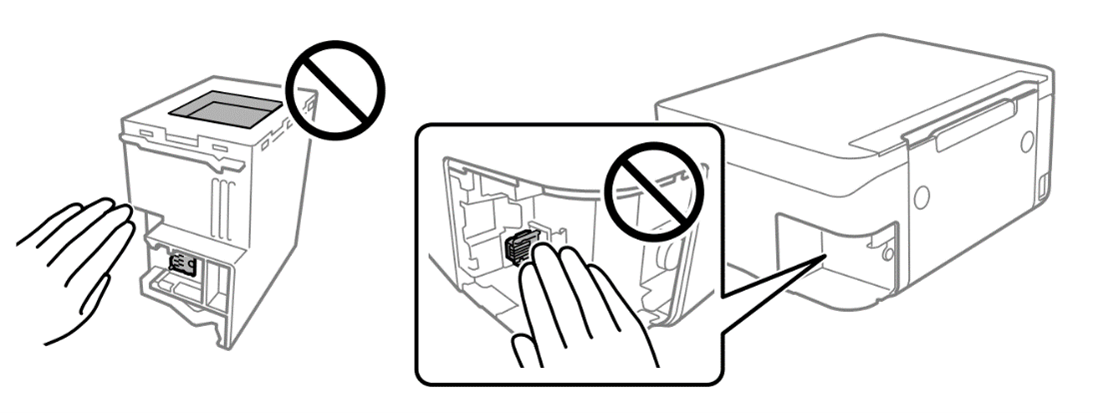
Do not touch the green chip on the side of the maintenance box. Doing so may prevent normal operation. -
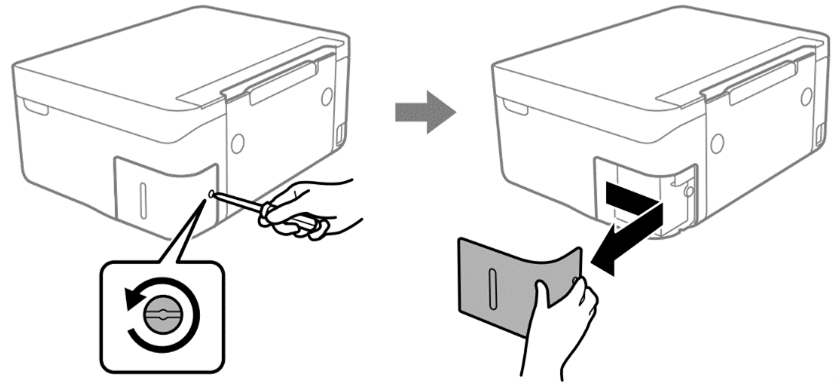
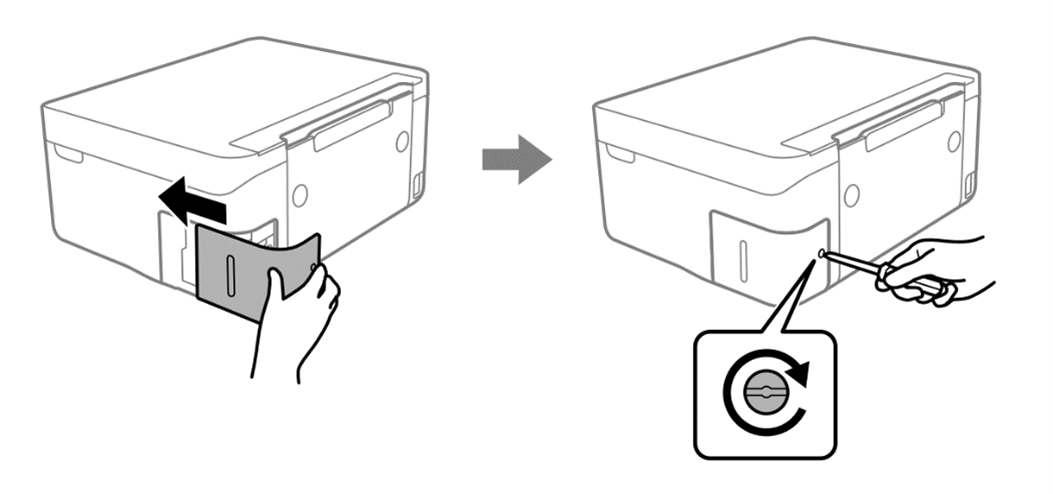
Loosen the screw with a flat-head screwdriver, and then remove the cover.
-
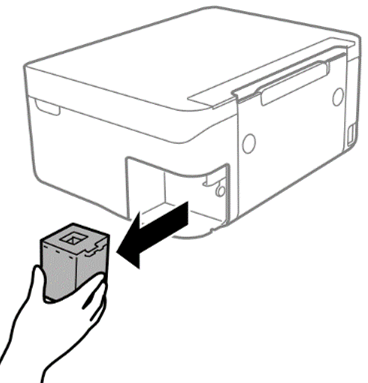
Remove the maintenance box.
 Note:
Note:
Do not touch the sections shown in the illustration. Doing so may prevent normal operation and you may get smeared with ink.
-
Put the used maintenance box in the transparent bag that came with the new maintenance box and seal the bag shut.

-
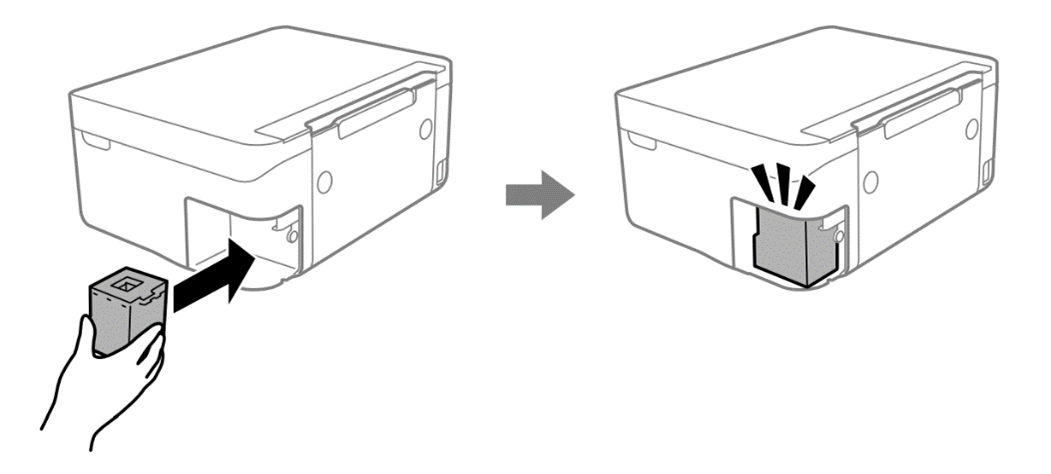
Insert the new maintenance box all the way into the printer. Make sure you insert the box in the correct direction.
-
Reattach the cover and tighten the screw.
- Check the message and then press the OK button.