How to perform a basic scan with EPSON Scan
This article explains how to scan to your computer using EPSON Scan. It assumes that EPSON Scan is installed and the product is ready to use.
Start with the Epson product powered on and connected to the computer. Follow the instructions below:
- Open EPSON Scan:
Windows:
- Double-click the
 EPSON Scan icon on your Desktop.
 - Or, click the Start menu button and select All Programs or Programs > EPSON Scan > EPSON Scan.
Mac OS X:
- Open the Applications folder and double-click the EPSON Scan icon.
- Double-click the
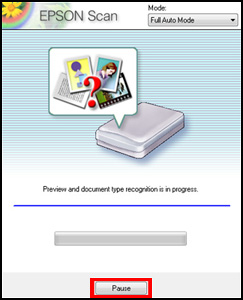
- If EPSON Scan starts scanning in the automatic mode, click on the Pause button during "Preview and document type recognition".
- For products with an ADF, EPSON Scan may start in the Home Mode. Refer to Step 4 for guidance on using the Home Mode.
 Note:
Note:Full Auto Mode is sufficient for most scanning jobs especially for a quick scan, however other modes are available that offer more options and user control over the settings and final scanned result.
The Home Mode or Professional Mode is recommended for scanning magazines, newspapers and, for scanners with a Transparency Unit (Film Adapter), for scanning film. These modes can also be used for photos and documents, where editing or more options are required. For products with an ADF, Epson Scan also offers the Office Mode.
- For products with an ADF, EPSON Scan may start in the Home Mode. Refer to Step 4 for guidance on using the Home Mode.
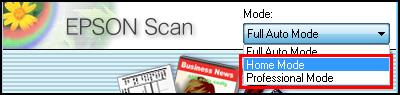
- Click on the pull-down menu in the top-right corner of the EPSON Scan window and click on Home Mode.

- In the Home Mode window choose the appropriate Document Type from the drop-down menu.
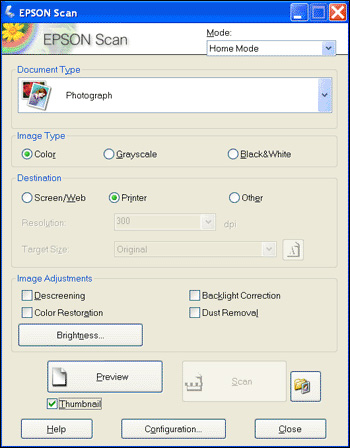
- Click on Preview. The scanner will preview the scanner bed and an image window will appear on-screen.
 Note:
Note:If you receive an error message, we recommend that you search the Epson website for a solution.
If you leave 'Thumbnail' enabled, as in the example above, it will scan in the thumbnail preview mode where the document is automatically detected and cropped for you:
- To save the image click on Scan, or make your changes and click on Preview again before completing the scan.
- On the final scan, the File Save Settings window will appear by default. Here you can change the Location that scanned files are saved to on your computer, the File Name given to your saved scan files, the Image Format and options specific to the selected format such as the quality or compression level.
- Check and change the file type and settings as required, then click OK.
You can choose to save your scan as either a PDF, TIFF (.TIF), JPEG (.JPG), or PRINT Image Matching II JPEG file.
For Windows users, you can save as BITMAP (.BMP), and for Macintosh users, you can save as PICT (.PCT). You can also scan Multi-TIFF (.TIF) and multi-page PDF files in the Home and Professional modes.
The Home and Professional modes allow the user control over extra features such as cropping, reduce/enlarge, Color Restoration, Dust Removal etc. Adjusting these settings after the Preview allows you to view the changes in the Preview window before completing the final scan.
Note:If you have previously unticked the Show this dialog box before next scan option in the File Save Settings screen, this menu will not appear when you click Scan. To open this menu click the folder icon next to the Scan button.

-
Creating a marquee on a preview image
- Click on Preview to perform a pre-scan. EPSON Scan prescans your images and displays them in the normal Preview window.
- Select the scan area by drawing a marquee around the image. If you are scanning multiple images, select the scan area of each image individually.
- To select your scan area, draw a marquee that marks the edges of the scan area on each image. You can move and resize the marquees to change the scan areas as necessary. Be sure to select all the marquees before scanning.
- Be careful to select only the image itself and not the surrounding area. If the selected area contains information outside the X-ray film then that information will be included in the exposure calculation and may result in an inaccurate exposure.
The Zoom function simply zooms into the selected area to allow more accurate cropping. You can navigate back to the Preview window by clicking the Preview tab at the top of the window.
- Make any desired image adjustments before scanning. See your scanner's user guide for more information.
- When you have finished adjusting the scan areas and making any further adjustments and settings, click the Scan button to scan your images.