How to Configure Push-Scan Button Settings in Epson Event Manager
Applies To
- Operating Systems: Windows, macOS
- Software: EPSON Event Manager
-
Related Articles:
- FAQ KA-01556 General push-scan setup and troubleshooting, including Event Manager taskbar icon issues.
Description
Use Epson Event Manager to customise the scanner's push-scan button. You can assign different actions and configure settings such as document type, image quality, destination folder, resolution and file format.
Solution
-
Open Epson Event Manager:
- Windows: select Start, or Start > Programs/All Programs > Epson Software > Event Manager.
- macOS: open Applications > Epson Software, then double-click Launch Event Manager.
-
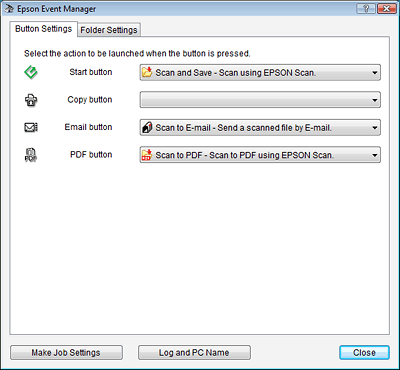
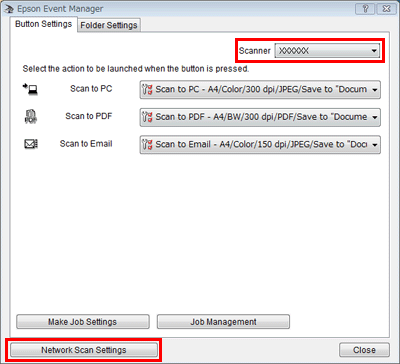
On the Button Settings tab, the button and action options shown depend on your product — a single-button model shows one action drop-down.
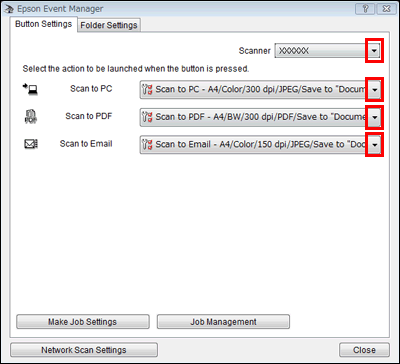
- Some models also require selecting your scanner from the Scanner drop-down.
- Click the arrow next to the action name (e.g. Scan to PC, Scan to PDF, Scan to Email) and select the action to assign.
-
To customise the action, click Make Job Settings, enter a Job Description, adjust the Scan Settings, then click OK.
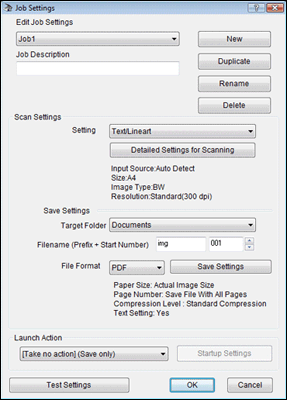
- Return to the previous step and select the action you just configured.
-
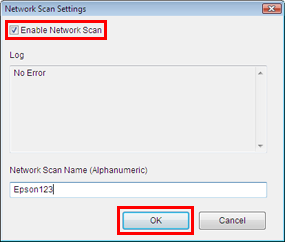
If using a network-capable All-In-One over Wi-Fi or Ethernet, confirm Enable Network Scan is ticked in the Network Scan Settings dialog, at the bottom of the Button Settings tab — this is required to use push-scan over the network.
-
Optionally set a unique Network Scan Name for each computer that will access the All-In-One (e.g. "MaryPC1", "Computer1"), then click OK.
- Click Close to close Epson Event Manager.
Note: This article explains how to configure push-scan settings. If push-scan is not working, or the Epson Event Manager icon is missing from the taskbar/menu bar, see KA-01556 for fulloting steps.
