How Do I Select the Print Resolution in the Windows Printer Software?
Applies To
- Operating Systems: Windows (this article does not cover macOS)
- Hardware: Epson inkjet printers using the standard Epson Printer Driver (quality option names and dialog layout may vary slightly by model)
- Software: Epson Printer Driver
- Related Articles: If you're seeing actual print quality problems (blurry output, missing or incorrect colours, banding) rather than choosing a resolution setting, see FAQ KA-02050, FAQ KA-01391, or FAQ KA-01531 instead.
Description
Print resolution is the number of dots per inch (dpi) used to represent an image. Rather than selecting the print resolution directly, in the driver's default mode you select a document type, and the printer automatically applies the matching resolution based on the paper type. This article lists the DPI value behind each named quality option, for both the default driver mode and the Advanced mode.
Solution
1. Quality Options in Default Mode
| Quality Option | DPI Value | Tip | Recommended Use |
|---|---|---|---|
| Draft | 180 dpi | Select for economical, high-speed printing. | For rough drafts with reduced print quality. |
| Text | 360 dpi | Select for medium-quality, standard text printing. | For text-only documents needing higher text quality (recommended with high-quality plain bond paper). |
| Text & Image | 720 dpi | Select for high-quality text and graphics printing. | For documents combining text and images (e.g. flyers, handouts, documents with block colours such as graphs). |
| Photo | 1440 dpi | Select for high-quality photographic printing. | For photos and graphics needing good quality and speed. |
| Best Photo | 2880 dpi | Select for top-quality photographic printing. | For photos or graphics needing the highest print quality. |
Selecting the Correct Paper Type and Print Quality
If the paper type set in the printer driver doesn't match the paper actually loaded, the printer can't control ink volume properly — this causes ink to run, uneven tones, and poor print quality. Using non-genuine paper can cause the same problems.
It's also important to match the print resolution to the paper. Too low a resolution can leave gaps in the print; too high a resolution for the paper type (e.g. selecting "Best Photo" on plain paper) can cause blurry or over-saturated output.
2. Quality Options in Advanced Mode
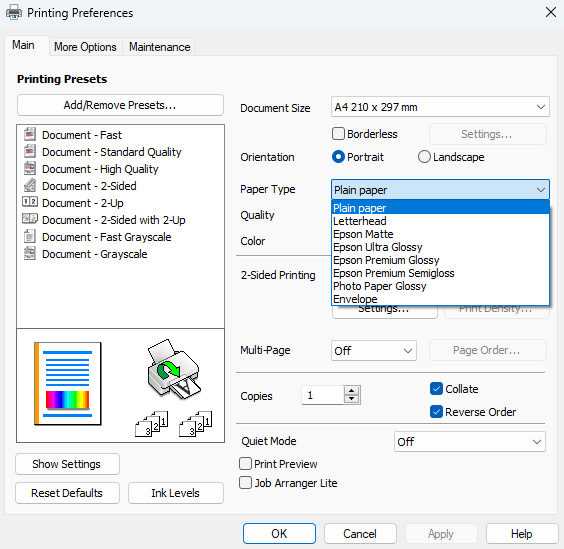
In the driver's Advanced mode, some quality options use different names for the same underlying resolution. For example, Default mode's "Text" and Advanced mode's "Normal" both select 360 dpi — they are the same setting under a different name, not two different options. The driver automatically limits which quality options are available based on the Media Type you select, so only resolutions appropriate for that paper are offered.
| Quality Option | DPI Value | Tip | Recommended Use |
|---|---|---|---|
| Economy / Draft | 180 dpi | Select for economical, high-speed printing. | For rough drafts with reduced print quality. |
| Normal | 360 dpi | Select for medium-quality, standard text printing. | For text-only documents needing higher text quality (recommended with high-quality plain bond paper). |
| Fine | 720 dpi | Select for high-quality text and graphics printing. | For documents combining text and images (e.g. flyers, handouts, documents with block colours such as graphs). |
| Photo | 1440 dpi | Select for high-quality photographic printing. | For photos and graphics needing good quality and speed. |
| Best Photo | 2880 dpi | Select for top-quality photographic printing. | For photos or graphics needing the highest print quality. |
| Photo RPM | 5760 dpi† | Select for the highest available photographic print quality. | For exceptional print tasks where image quality is the primary consideration. Printing will take longer in this mode. |
† Depending on your printer model, Photo RPM is either "5760 × 720" or "5760 × 1440" optimised dpi, available on suitable media using RPM (Resolution Performance Management).
3. Accessing Advanced Mode
- Open Printing Preferences and make sure the driver dialog is open on the Main tab.
-
Click the Advanced tab or button.
Note: For some drivers, you'll first need to click the circle beside Custom, then choose Advanced from the drop-down menu. With this driver style, the DPI value is usually shown beside the print quality option.
-
In the Print Quality & Paper Options menu, check and select your settings:
- Source — for some printers, this offers more than one option representing different media paths through the printer.
- Media type — select the specific paper type you'll print to.
- Print quality — options here depend on your paper/media selection; see the Advanced-mode table above for the corresponding DPI values.
- Paper size — select the specific size of the paper you'll print to.
- Check any other settings such as High Speed (on by default — we recommend deselecting it for the best print results) and Color Management.
Note: Your printer's driver may have a different layout, but by default it will automatically select the optimum print quality for your chosen media type. You can also specify a resolution directly via the Quality Options dialog: select Quality Options from the drop-down menu beside Print Quality. This lets you change the quality level and view the corresponding setting in the Print Quality field.
