Scan to PDF: How to create single and multi-page files with Epson Scan
Scan to PDF: How to Create Single and Multi-Page Files With Epson Scan
Applies To
- Software: EPSON Scan
-
Related Articles:
- KA-01092 (basic scan with EPSON Scan)
Description
You can create either single-page or multi-page PDF files using EPSON Scan. Pages can be scanned from the ADF or individually from the document table and combined into a single PDF document.
Summary: Select PDF as the file type, scan the first page, choose Add Page for additional pages, then save the file. Before saving, you can optionally delete, rotate or reorder pages.
Solution
Scanning a PDF
-
Open EPSON Scan.
-
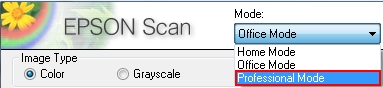
Make sure Epson Scan is in Professional Mode.
If EPSON Scan is not set to Professional Mode, change the mode.
To change the scan mode, click on the arrow in the Mode box in the top-right corner of the EPSON Scan window.

Select the Professional Mode from the drop-down menu.
-
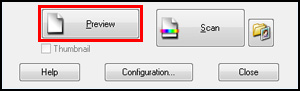
Click the Preview button to preview your image(s).
-
Select your scan area from the Preview window.
-
When you are ready to scan, click
 File Save Settings.
-
The File Save Settings window appears.
-
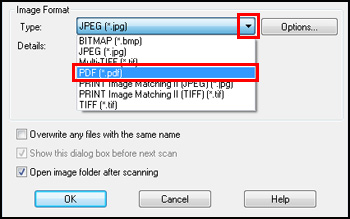
Select PDF as the Type setting.
-
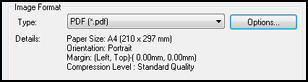
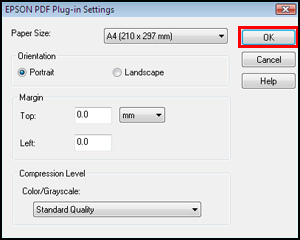
The current Paper Size, Orientation, Margin, and Compression settings are displayed below it.
-
If you need to change any of the current PDF settings, click the Options button.
-
Select the settings that you want for your document and click OK to return to the File Save Settings window.
-
Once the settings are correct, click OK.
-
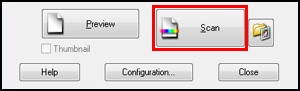
Click Scan.
-
If the File Save Settings window appears again, click OK.
-
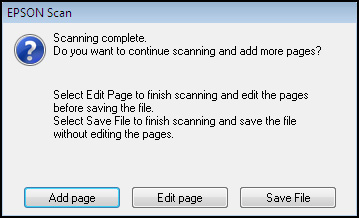
Your page will be scanned and the following window will be displayed.
-
If you are scanning multiple pages, click Add page.
Note: You can scan up to 100 pages into a single PDF document.
-
Replace the first page on the document table with the second page and click Scan. Repeat this step for each page in your document.
-
When finished, if you don't need to edit your pages, click Save File. All the document pages are saved in a PDF file in the location specified in File Save Settings.
Note: You will not be able to edit the file if you choose Save File. If you need to edit the scanned pages, you will need to do this before you save the file - click Edit page.
Editing Pages Before Saving
To create a PDF, select PDF as the file type, scan the first page, choose Add Page for additional pages, then save the file when finished. You can optionally edit, rotate or delete pages before saving.
The Editing Page window displays thumbnails of each scanned page.

You can use the tools below the Editing Page window to select, rotate, reorder, and delete pages in your document. Click the Help button for details.
-
If you want to include all the document pages in your PDF file as they currently look, click on OK.
-
If you do not need to include some of the pages, select the pages with the appropriate button and then click on
 to delete them.
-
To select odd pages, click on
 .
.
-
To select even pages, click on
 .
.
-
-
To select an individual page, click on the thumbnail then click on
Delete.
Note: The
Delete icon is not available when all document pages are selected.
-
If you want to rotate the pages, select the pages by clicking on the individual pages or use the appropriate page selection button.
-
To select odd pages, click on
.
-
To select even pages, click on
.
-
To select all pages, click on
 .
.
-
Click the
 left or
  right icon to rotate them.
-
-
When you have finished editing your document pages, click OK.
-
All the document pages on the Editing Page window are saved in a PDF file in the location specified in File Save Settings.
Note: If scanning multiple pages via the ADF, EPSON Scan displays an editing page where you can view, reorder, rotate, or delete pages before saving.
